> ## Documentation Index
> Fetch the complete documentation index at: https://docs.jsonsilo.com/llms.txt
> Use this file to discover all available pages before exploring further.
# Create Silo
> Learn how to create a silo in JSONsilo to store and manage your JSON files effectively.
## Introduction
Creating a silo in JSONsilo allows you to securely store and manage your JSON files. This guide will walk you through the steps to create a new silo, and access it using the unique URL provided.
### Step 1: Navigate to Silos dashboard
Click on the "Silos" in the main navigation menu to access the Silos dashboard.
You will see a list of existing silos if you have any. To create a new silo, click on the "Create" or "Create new Silo" button or "Getting Started" if you have no silos yet.
 ### Step 2: Click on "Create Silo"
Click on the "Create Silo" button to start the silo creation process.
If you want to create a private silo that requires an [Access Key](/keys/access-keys) for access, select the "Private" option in the access field.
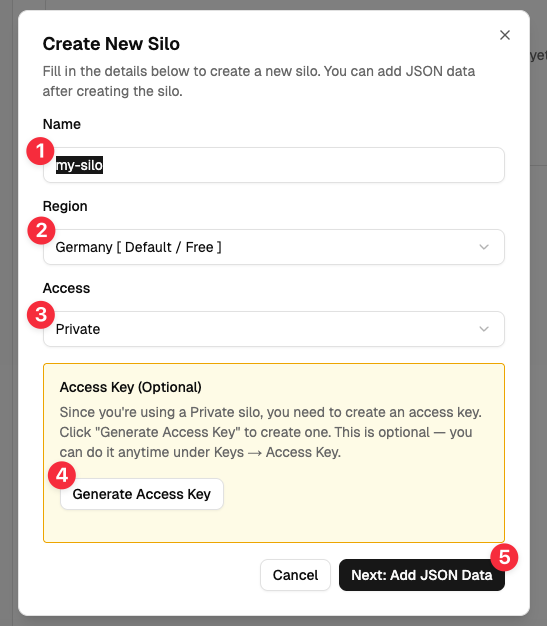
### Step 2: Click on "Create Silo"
Click on the "Create Silo" button to start the silo creation process.
If you want to create a private silo that requires an [Access Key](/keys/access-keys) for access, select the "Private" option in the access field.
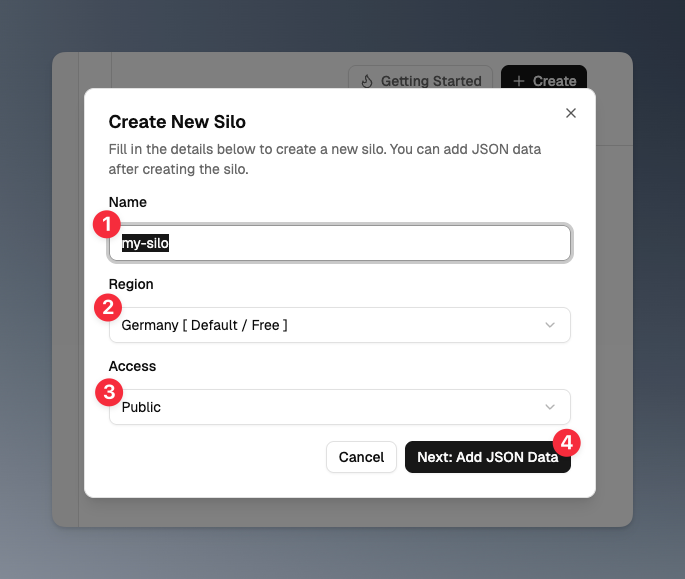
 If you want to create a public silo that is accessible to anyone with the link, select the "Public" option in the access field.
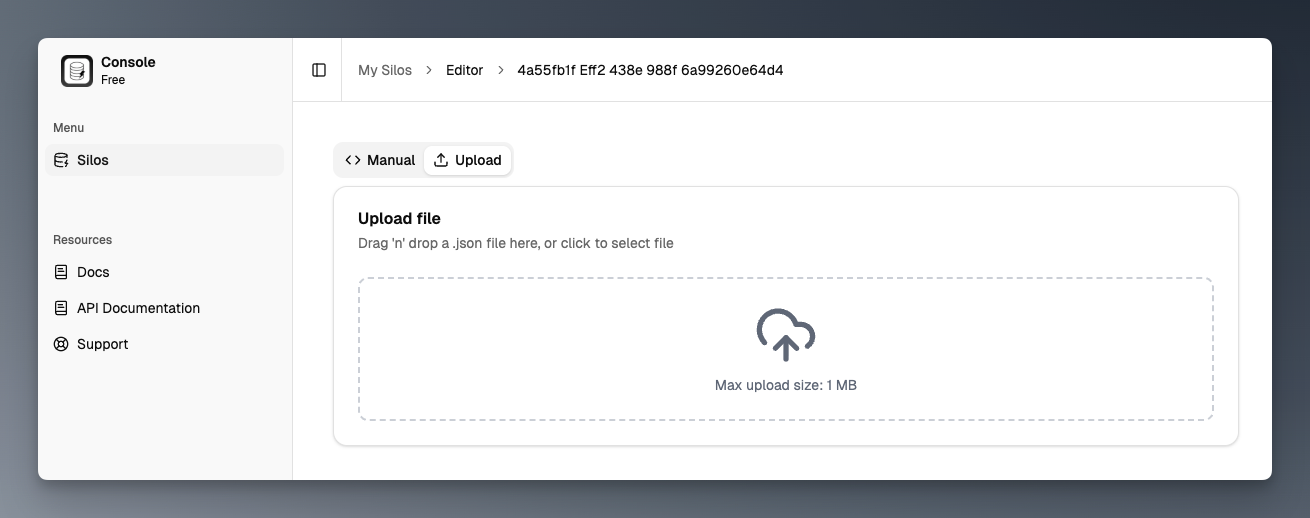
 ### Step 3: Create/Upload your JSON file
Once you click on the "Next: Add JSON Data" button, you will be directed to the [JSON Editor](/editor/json-editor) page. You can either create a new JSON file from scratch using the built-in editor or upload an existing JSON file from your computer.
### Step 3: Create/Upload your JSON file
Once you click on the "Next: Add JSON Data" button, you will be directed to the [JSON Editor](/editor/json-editor) page. You can either create a new JSON file from scratch using the built-in editor or upload an existing JSON file from your computer.
 1. **Manual**: Use the JSON editor to create your JSON file by adding key-value pairs, arrays, and nested objects as needed.
2. **Upload**: Click on the "Upload" tab button to upload a JSON file from your computer. Make sure the file is in valid JSON format.
1. **Manual**: Use the JSON editor to create your JSON file by adding key-value pairs, arrays, and nested objects as needed.
2. **Upload**: Click on the "Upload" tab button to upload a JSON file from your computer. Make sure the file is in valid JSON format.
 3. **Editor**: You can use the editor to create JSON data manually. You can also edit any JSON data that you upload if needed.
4. **Save**: After creating or uploading your JSON file, click the "Save" button to save and deploy your silo.
5. **Save & Close**: After creating or uploading your JSON file, click the "Save & Close" button to save and close the editor and you will be redirected to the silo details page.
That's it! You have successfully created a silo in JSONsilo. ✨
## What's next?
* Learn how to [view your silo details and access URL](how-to/view-silo).
* Learn how to [update your silo data](how-to/update-silo).
* Learn how to [delete your silo](how-to/delete-silo).
3. **Editor**: You can use the editor to create JSON data manually. You can also edit any JSON data that you upload if needed.
4. **Save**: After creating or uploading your JSON file, click the "Save" button to save and deploy your silo.
5. **Save & Close**: After creating or uploading your JSON file, click the "Save & Close" button to save and close the editor and you will be redirected to the silo details page.
That's it! You have successfully created a silo in JSONsilo. ✨
## What's next?
* Learn how to [view your silo details and access URL](how-to/view-silo).
* Learn how to [update your silo data](how-to/update-silo).
* Learn how to [delete your silo](how-to/delete-silo).